 FREE USA SHIPPING over $99

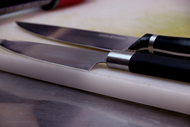
Using a Knife Sharpener: High Level Notes for a Stone
Jul 24 2026 - 3:11
Using a sharpening stone is a little different from using a Lansky knife sharpener or some other system that has detailed, thorough instructions. The use of a stone will require a little more familiarity in order to get a serviceable edge. Here’s what you need to know.
Selecting the Appropriate Grit
Most important is that you select an appropriate grit. If you already have a very sharp edge and are touching it up, stepping down to a coarse stone will ruin your edge. Conversely, if you have a very dull edge, starting with a 1000 grit stone will be impractical because it will take you forever to get your edge back, even with a soft steel.
So, the first step in sharpening a knife with a stone is to select the right grit. If you have a very dull edge, like a butter knife or near it, you want a very coarse, very aggressive stone. Low grits are best here, between 80 and 200, and the lower the better.
If your edge is in the middle of the road, sharp but not sharp enough for detailed work or for shaving, then you want a stone of medium grit, somewhere between 200 and 600.
If your edge is fairly sharp and all you’ll be doing is touching it up, then you want a high grit stone. You’ll want 600 grit or higher, above 1000 grit to get a very sharp, nearly razor sharp edge.
To finish your edge, you will need a strop, but that is not actually a knife sharpener and is a topic for another post.
Using a Sharpening Stone
Once you have a sharpening stone selected, you need to select the proper angle. This will be determined in part by the bevel that’s already on the knife, as well as by the edge you are looking to restore.
If the knife has a Scandi grind, also known as a half-flat grind, simply place the bevel flat down on the stone. It should be ground so that the Scandi grind slopes straight to the edge without a secondary bevel, so following that grind should give you the right angle.
For most other knives, the angle you’ll want should be somewhere between 15° and 20°. The shallower the angle, the finer and more fragile the edge will be, and the more obtuse the angle, the more robust the edge will be, at a slight cost to keenness.
Also, keep in mind the end use of the tool. Straight razors and woodworking tools, as well as filet knives and boning knives, tend to have very, very fine edges. Machetes, camp knives, axes, hatchets, tomahawks and other hard-use tools tend to have much more oblique edges with less shallow bevel angles. These tools are designed to hold a stout edge that will not be damaged by the work to which they are applied.
You can use a knife angle guide to ensure you get the right angle every time, but for most intents and purposes you can eyeball it by placing the flat of the blade, flat down against the stone, and then lifting the spine up about a centimeter off the stone, keeping the edge in contact with the stone. Following this basic protocol should give you an appropriate edge in most instances, although it is far from an exact science.
Once you’ve established the right angle, pass the knife, edge forward, over the stone, keeping that angle consistent, as though you are trying to shave a small sliver off the top of the stone. Be sure to keep the angle steady on all portions of the edge, along the belly and towards the tip. Inconsistencies in sharpening angle will impact the quality of your edge.
Keep count of the number of times you pass the knife over the stone, then flip the knife over and repeat the process on the other side. Make sure you keep the angle consistent along both edges and repeat the number of strokes on both sides, or you will get an inconsistent edge. A good place to start is between 20 and 50 passes on each side.
Once you have done this, you can check the edge. You should already feel that it is sharper, assuming that you have chosen a sharpening stone of appropriate grit. You may also feel that you have raised a burr along the edge, which you can remove with a few more passes along the stone on both sides of the knife.
If the knife was very dull and you started with a very coarse, low-grit knife sharpener, if you are trying to establish a finer edge, you will need to move up to a higher grit stone once you have started re-forming your edge.
Once you do that, repeat the same process with the higher grit stone, moving onto successively higher grits as you get your edge back. Once you’re done, you should have a fairly fine edge.
Shop Lansky Knife Sharpeners, Systems and More
Hopefully you found this high-level guide for the use of a sharpening stone to be helpful, but if you need to get your edge back and you’re not quite ready yet to learn how to use a stone as a knife sharpener, shop our collection of knife sharpening systems.
We carry Lansky knife sharpeners and other sharpening systems that come with detailed instructions, which are very easy and straightforward to use, and which are effectively foolproof.
They require much less training to learn to use proficiently, and there is a shorter learning curve associated with them as well.
Regardless, we carry many different knife sharpener options including both stones and systems. Check out our collection to find a solution that works for you and get in touch with us directly if you have questions or need a recommendation. Otherwise, sharper knives are closer than you think.